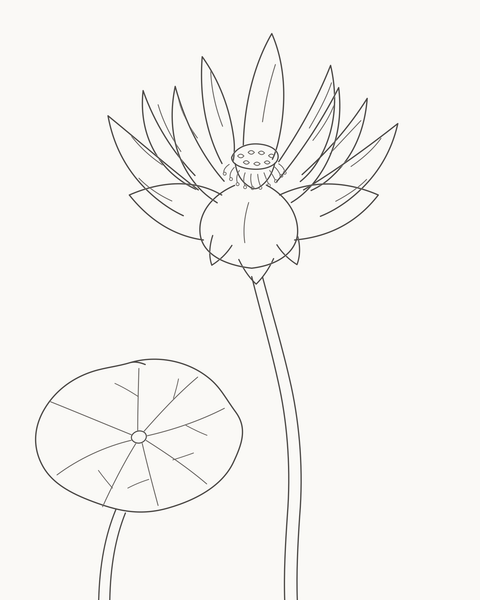




Draw a complete flowering sprig in eight permanent line stages. Build one broad open bloom, turn a smaller bloom to the side, connect both flowers with a single stem and finish with two unequal leaves. The result is a clean pencil outline that teaches petal direction and attachment without shading or temporary construction marks.
Difficulty: Beginner, with some careful petal overlaps
Time: Allow about 35–50 minutes. This is an untested estimate, so pause at a centre or junction when needed.
Medium: HB or No. 2 pencil, line only
Read the centre before the petals
A flower facing you has a rounder centre; when it turns, that centre appears narrower and the petals on the near and far sides occupy different amounts of space. This lesson uses that simple relationship twice. The main flower has a shallow oval and five broad petals. The smaller flower has a narrower centre and four visible petals, so it reads as the same kind of invented flower seen from a stronger angle rather than a reduced copy. [3]
This is a designed observation exercise, not a botanical identification plate. Real flowers vary widely. [1][2] The two simplified support forms beneath the blooms help you see where petals, sepals and stalk meet, while the generic petal shapes leave room to concentrate on direction and overlap.
Every mark in the stage images belongs to the finished line drawing. Keep each accepted line as you progress. There is no hidden circle, later cleanup pass or instruction to trace over the drawing.
Materials
- A well-sharpened ordinary HB pencil; a No. 2 pencil is equivalent.
- Smooth drawing paper, an upright sketchbook page or a sheet of unlined printer paper.
- A clean eraser for correcting the newest misplaced section only.
- A pencil sharpener.
- Optional: a clear photograph of a simple flower, used only to compare uneven petal widths and how the centre changes when viewed at an angle.
You do not need a ruler, compass, marker, coloured pencil, blending stump, tracing paper or several graphite grades. An ordinary school pencil or a 0.5–0.7 mm mechanical pencil is suitable.
Before you draw
Imagine a tall 4:5 frame on the paper. The larger bloom sits high and left, the smaller one occupies the open area to its right, and the stem travels down through the lower half. Leave generous space below the first centre; beginning in the middle of the sheet will crowd the leaves and stem.
Use a clear, quiet line. The petal and leaf outlines can be slightly firmer than the short inner folds and side veins, but do not make a dark rim around the flowers. The finish is line only, so the upper-left light direction does not create a shadow or tonal area in this exercise.
If you use the optional grid, treat it as a screen for comparing position and size. Do not copy grid lines onto the paper. The separate Stage 1 cue identifies the first centre and its tilt; it is a placement aid, not part of the flower.
Darker lines are new in the current stage. Earlier marks remain visible at reduced strength.
1. Place the main centre and petal directions

Stage 1 of 8. A tilted centre and five unequal directions establish the main bloom high-left. 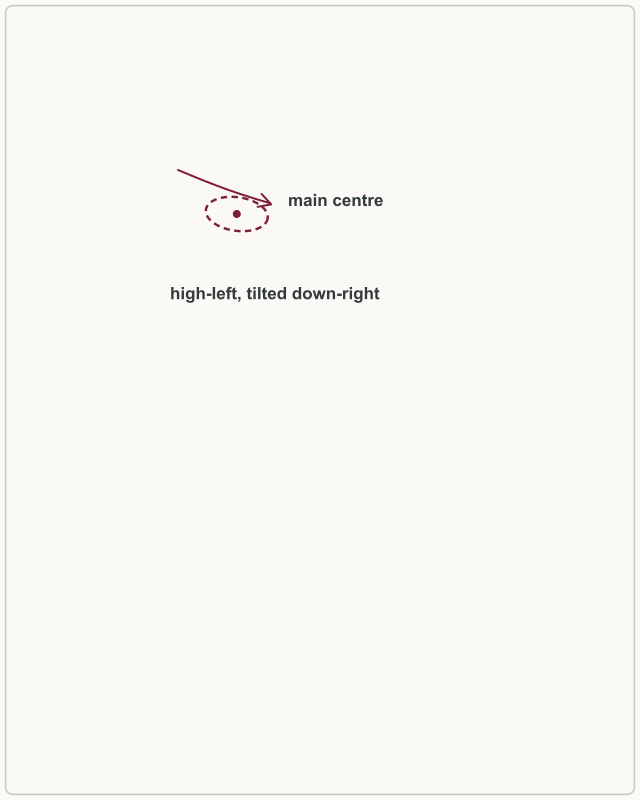
Placement cue: locate the main centre high-left around x40% and y29%, then copy its down-right tilt. Leave the frame, locator and arrow out of the drawing. Locate the main centre high-left, at roughly 40% of the drawing area's width and 29% of its height. Draw a small shallow oval tilted gently down towards the right. It should be wider than it is tall.
Add five short permanent fold lines from distinct places around the oval. Work in this order: upward, upper-left, upper-right, lower-left, then lower-right. Make the directions and lengths unequal. They show where each petal will travel, and they remain visible inside the completed flower.
Look for this before moving on: the oval is high-left and visibly tilted, all five short lines meet its edge, and there is ample empty space to the right and below.
If it goes wrong: correct only the newest oval segment or detached direction. Avoid enlarging the centre to absorb a mistake; keep the better lines and reconnect one short stroke cleanly.
2. Close the three rear petals
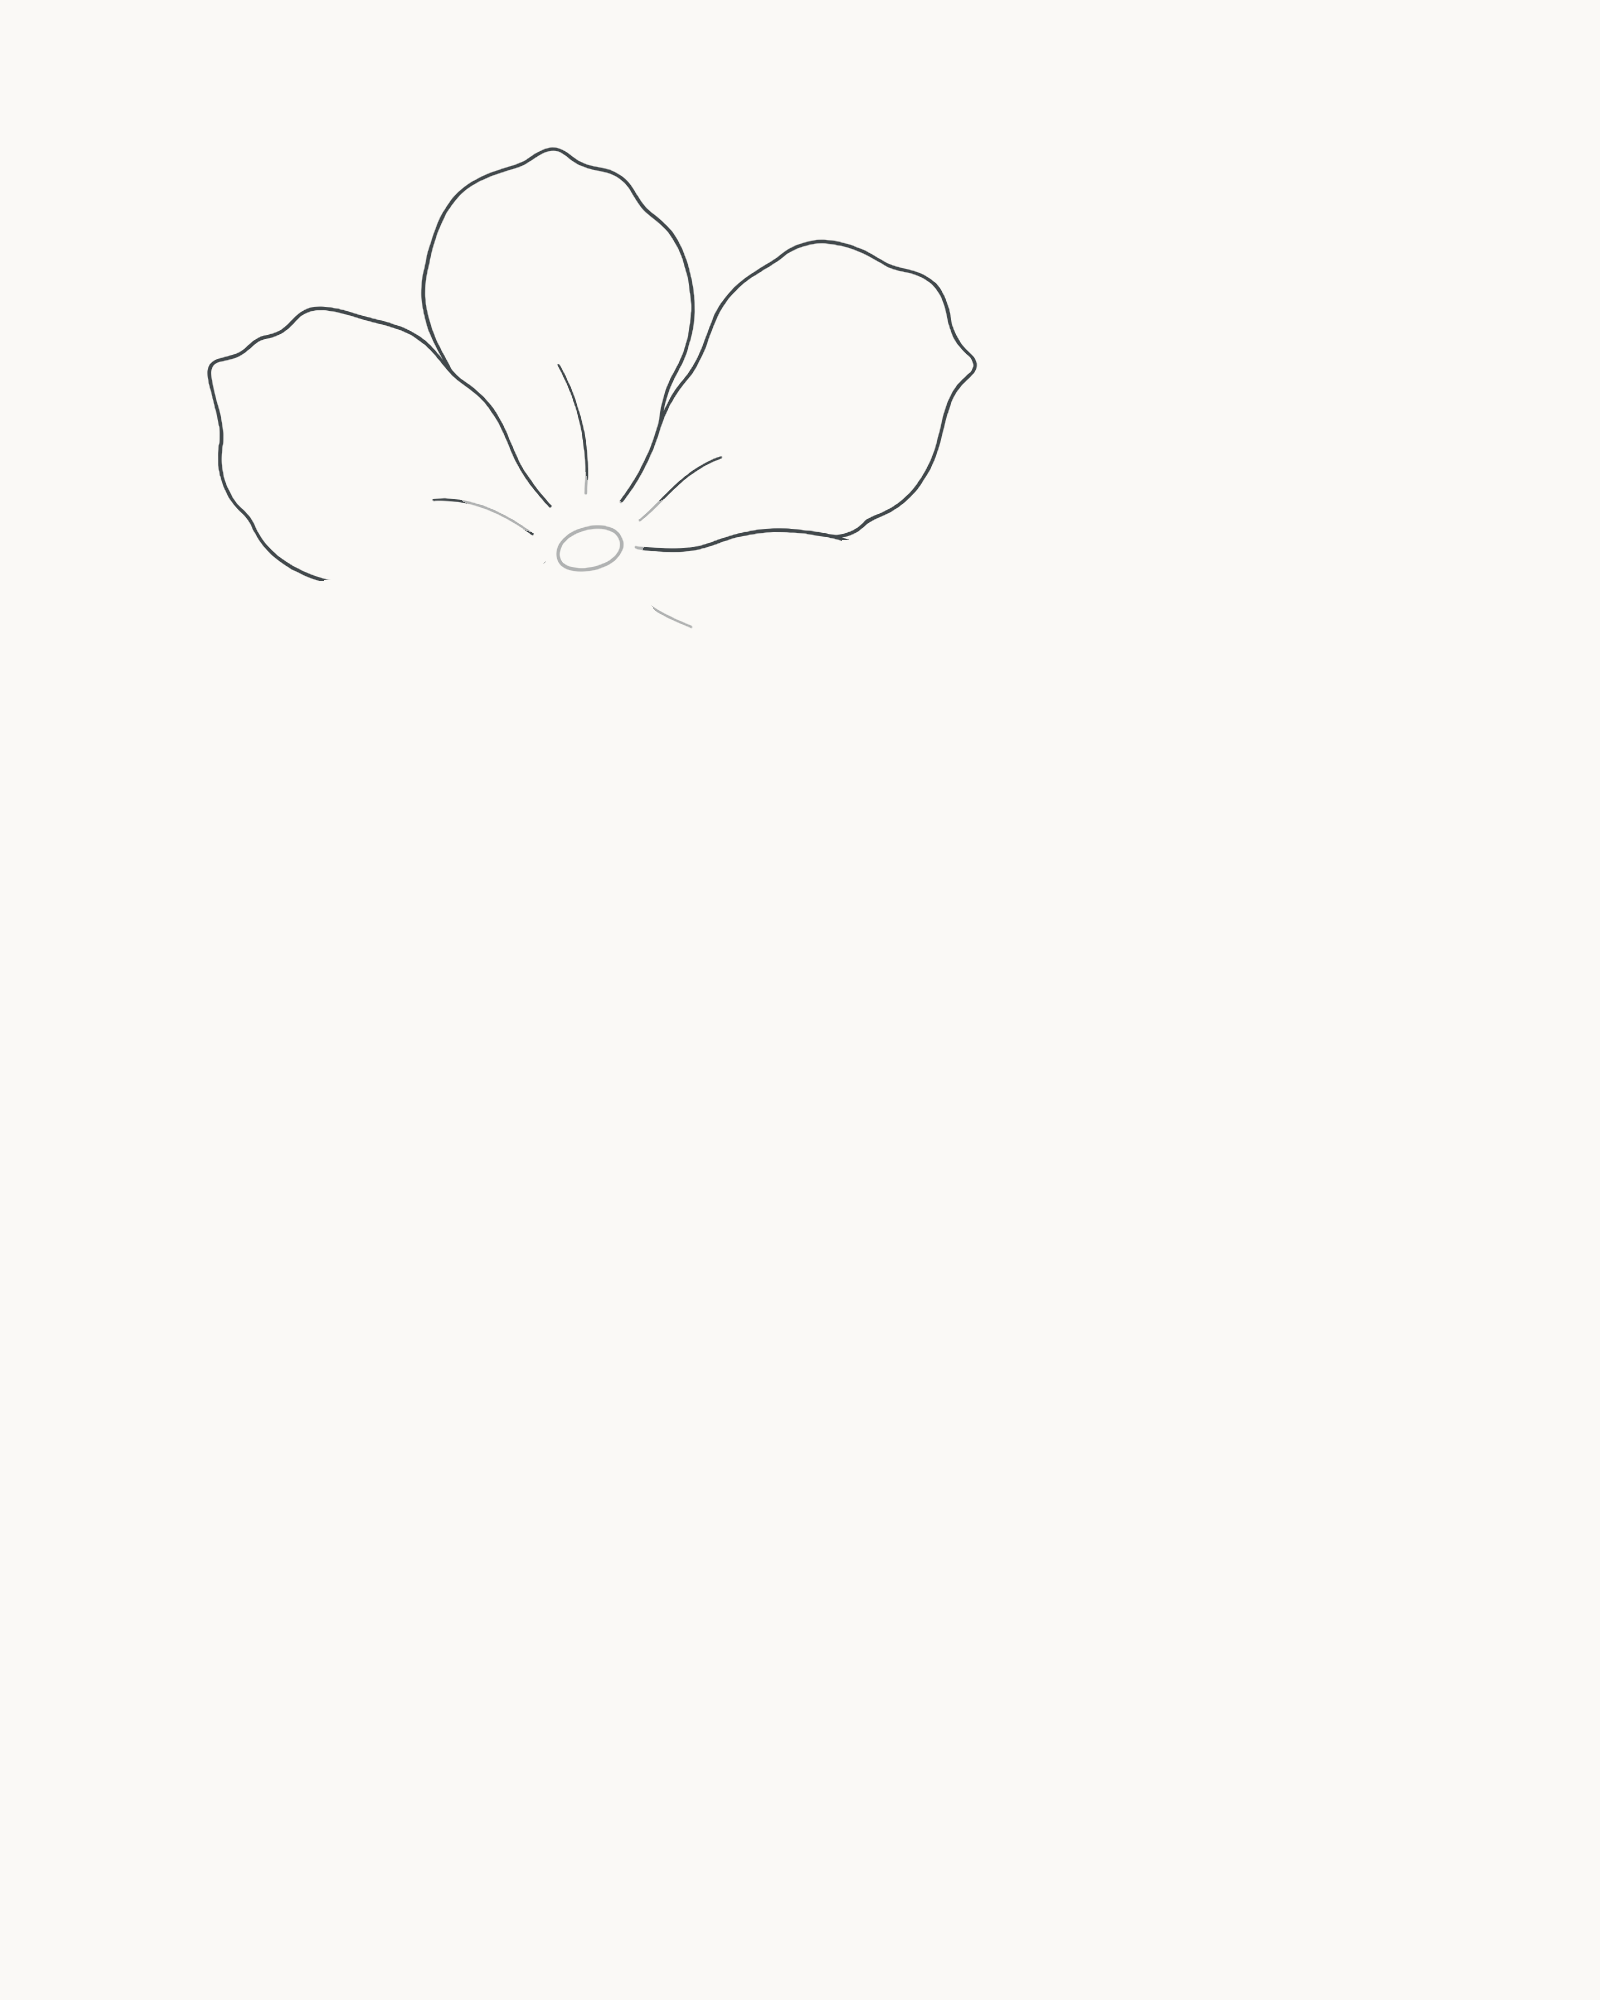
Stage 2 of 8. Three individually traceable petals build the back half of the main bloom. - Upper-left
- Upper
- Upper-right
Build the back half of the main bloom one petal at a time.
- Start at the upper-left part of the centre. Curve outward around the matching direction line and return to a separate contact near the oval.
- Draw the longest petal above the centre. Give its tip a small irregular change rather than a perfect semicircle.
- Close the upper-right petal last. Let it lean and widen differently from the left petal.
Complete each contour before starting the next. The bases should remain individually readable instead of merging into one dark knot.
Look for this before moving on: three complete, unequal petals fill the upper half of the flower; the middle petal reaches highest; and every contour returns to the centre without touching its neighbour's endpoint.
If it goes wrong: leave the centre and the two sound petals alone. Erase only the fresh contour between its two centre contacts, then redraw that petal with a clearer outward curve.
3. Close the two front petals
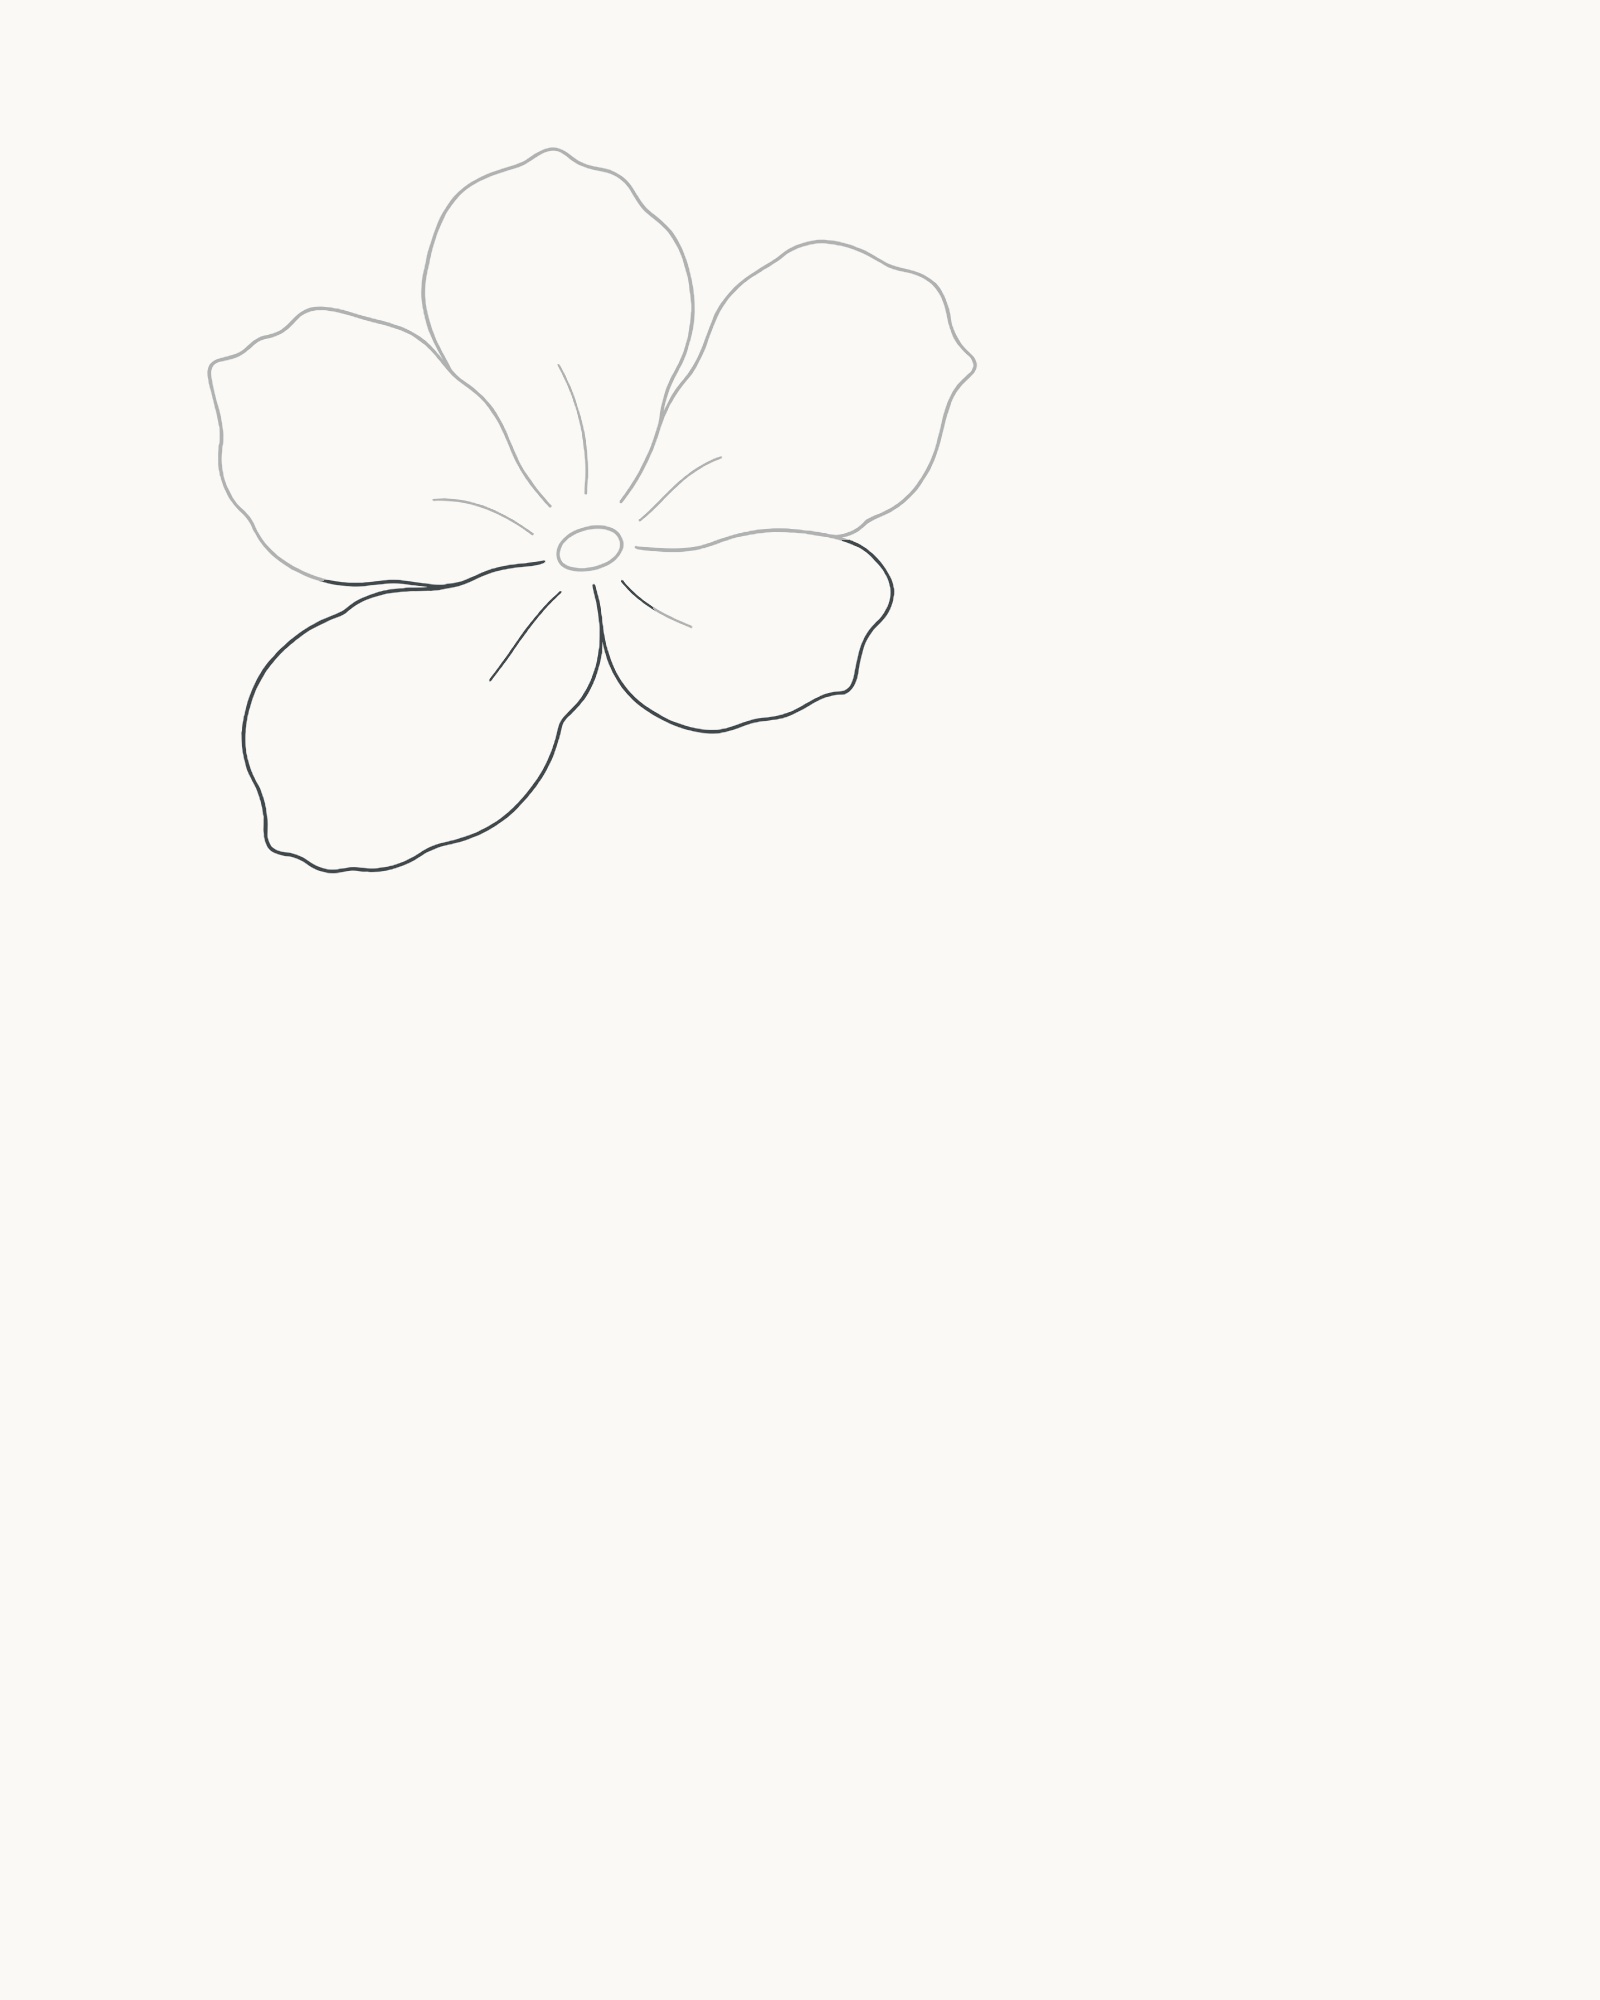
Stage 3 of 8. Two unequal front petals complete the open five-petal flower. Add the lower-right petal first. Keep it a little shorter and broader so it feels nearer to the viewer. Begin and end on the lower-right side of the oval without crossing the petal above it.
Now close the lower-left petal. Let this one extend farther and give its outside edge a different rhythm from the first. Together, the new pair completes the silhouette while preserving every line from Stage 2.
Look for this before moving on: the flower has five broad petals, the lower-right petal is broader and shorter than the lower-left, and the centre oval remains open and easy to see.
If it goes wrong: keep the stable centre contact and the better side of the new petal. Replace only the side that makes it look pasted on, mirrored or crossed over an earlier edge.
4. Place the turned centre and directions
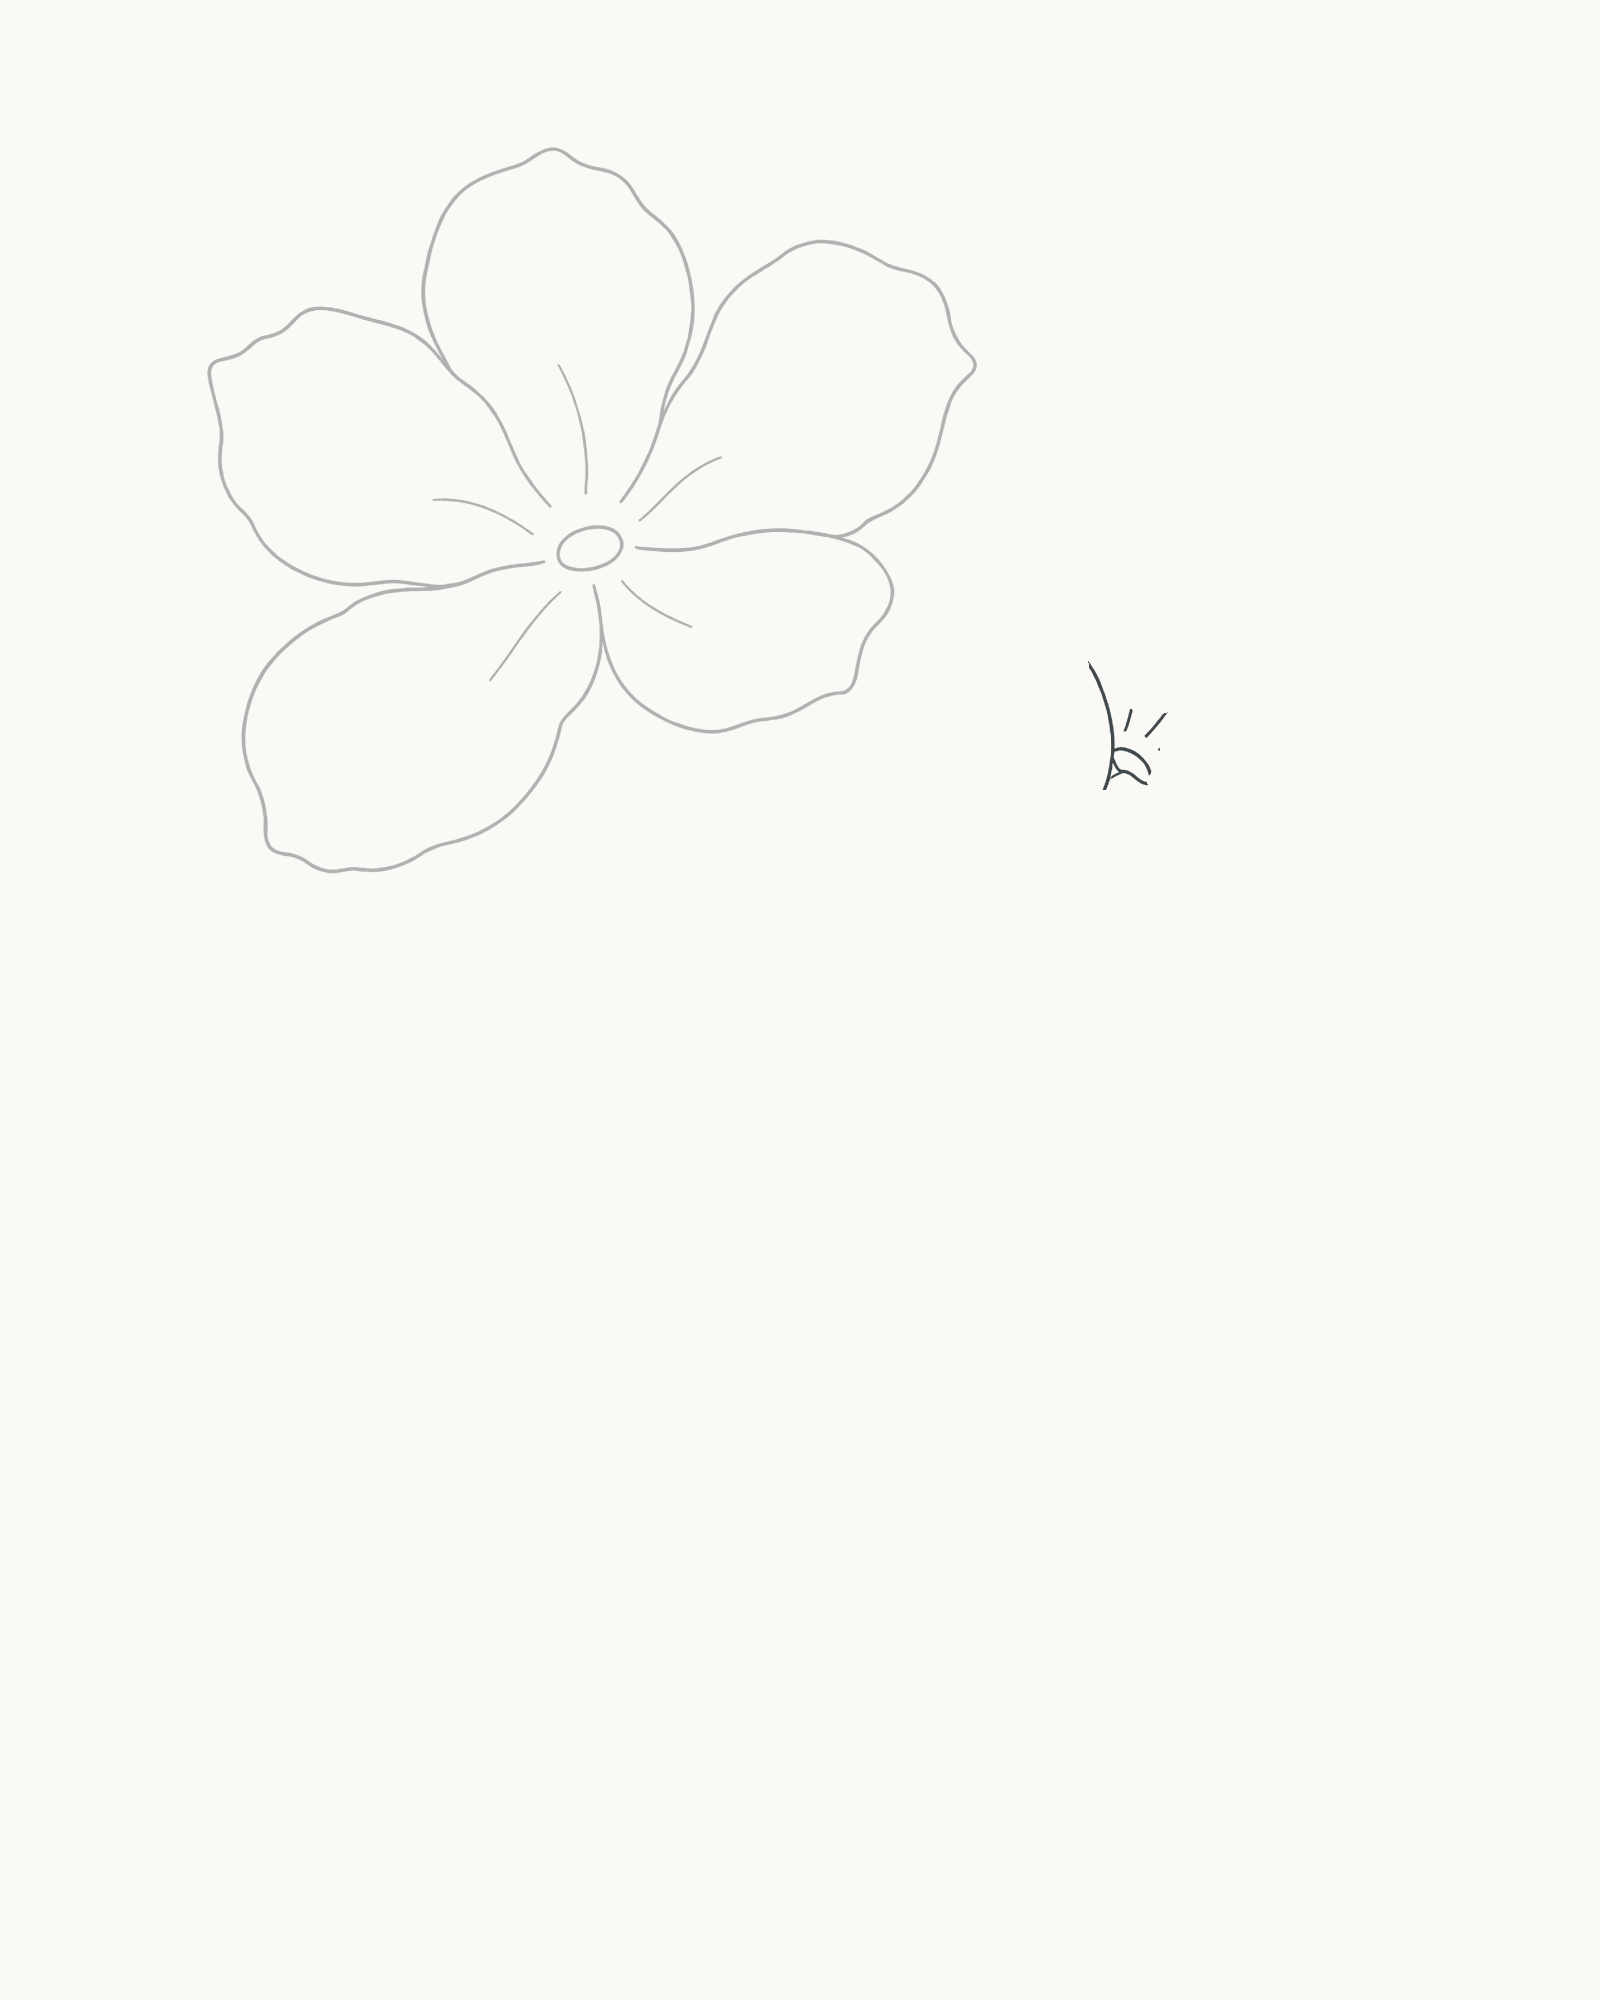
Stage 4 of 8. A narrower centre and four directions establish the stronger turn of the smaller flower. Move into the white space to the right of the main bloom. Draw the smaller narrow centre shown in the stage, tilted more strongly than the first. It is partly crescent-like rather than another full, level oval.
From it, add four unequal permanent directions: rear-left, rear-top, far-right and near/front. The front mark is the shortest. Keep this framework clearly separate from the finished main flower.
Look for this before moving on: the second centre is smaller, narrower and more tilted than the first, with four readable directions and a noticeably short front mark.
If it goes wrong: remove only the newest centre segment or direction line. Do not move, resize or edit the completed main flower to make room.
5. Close the four turned petals
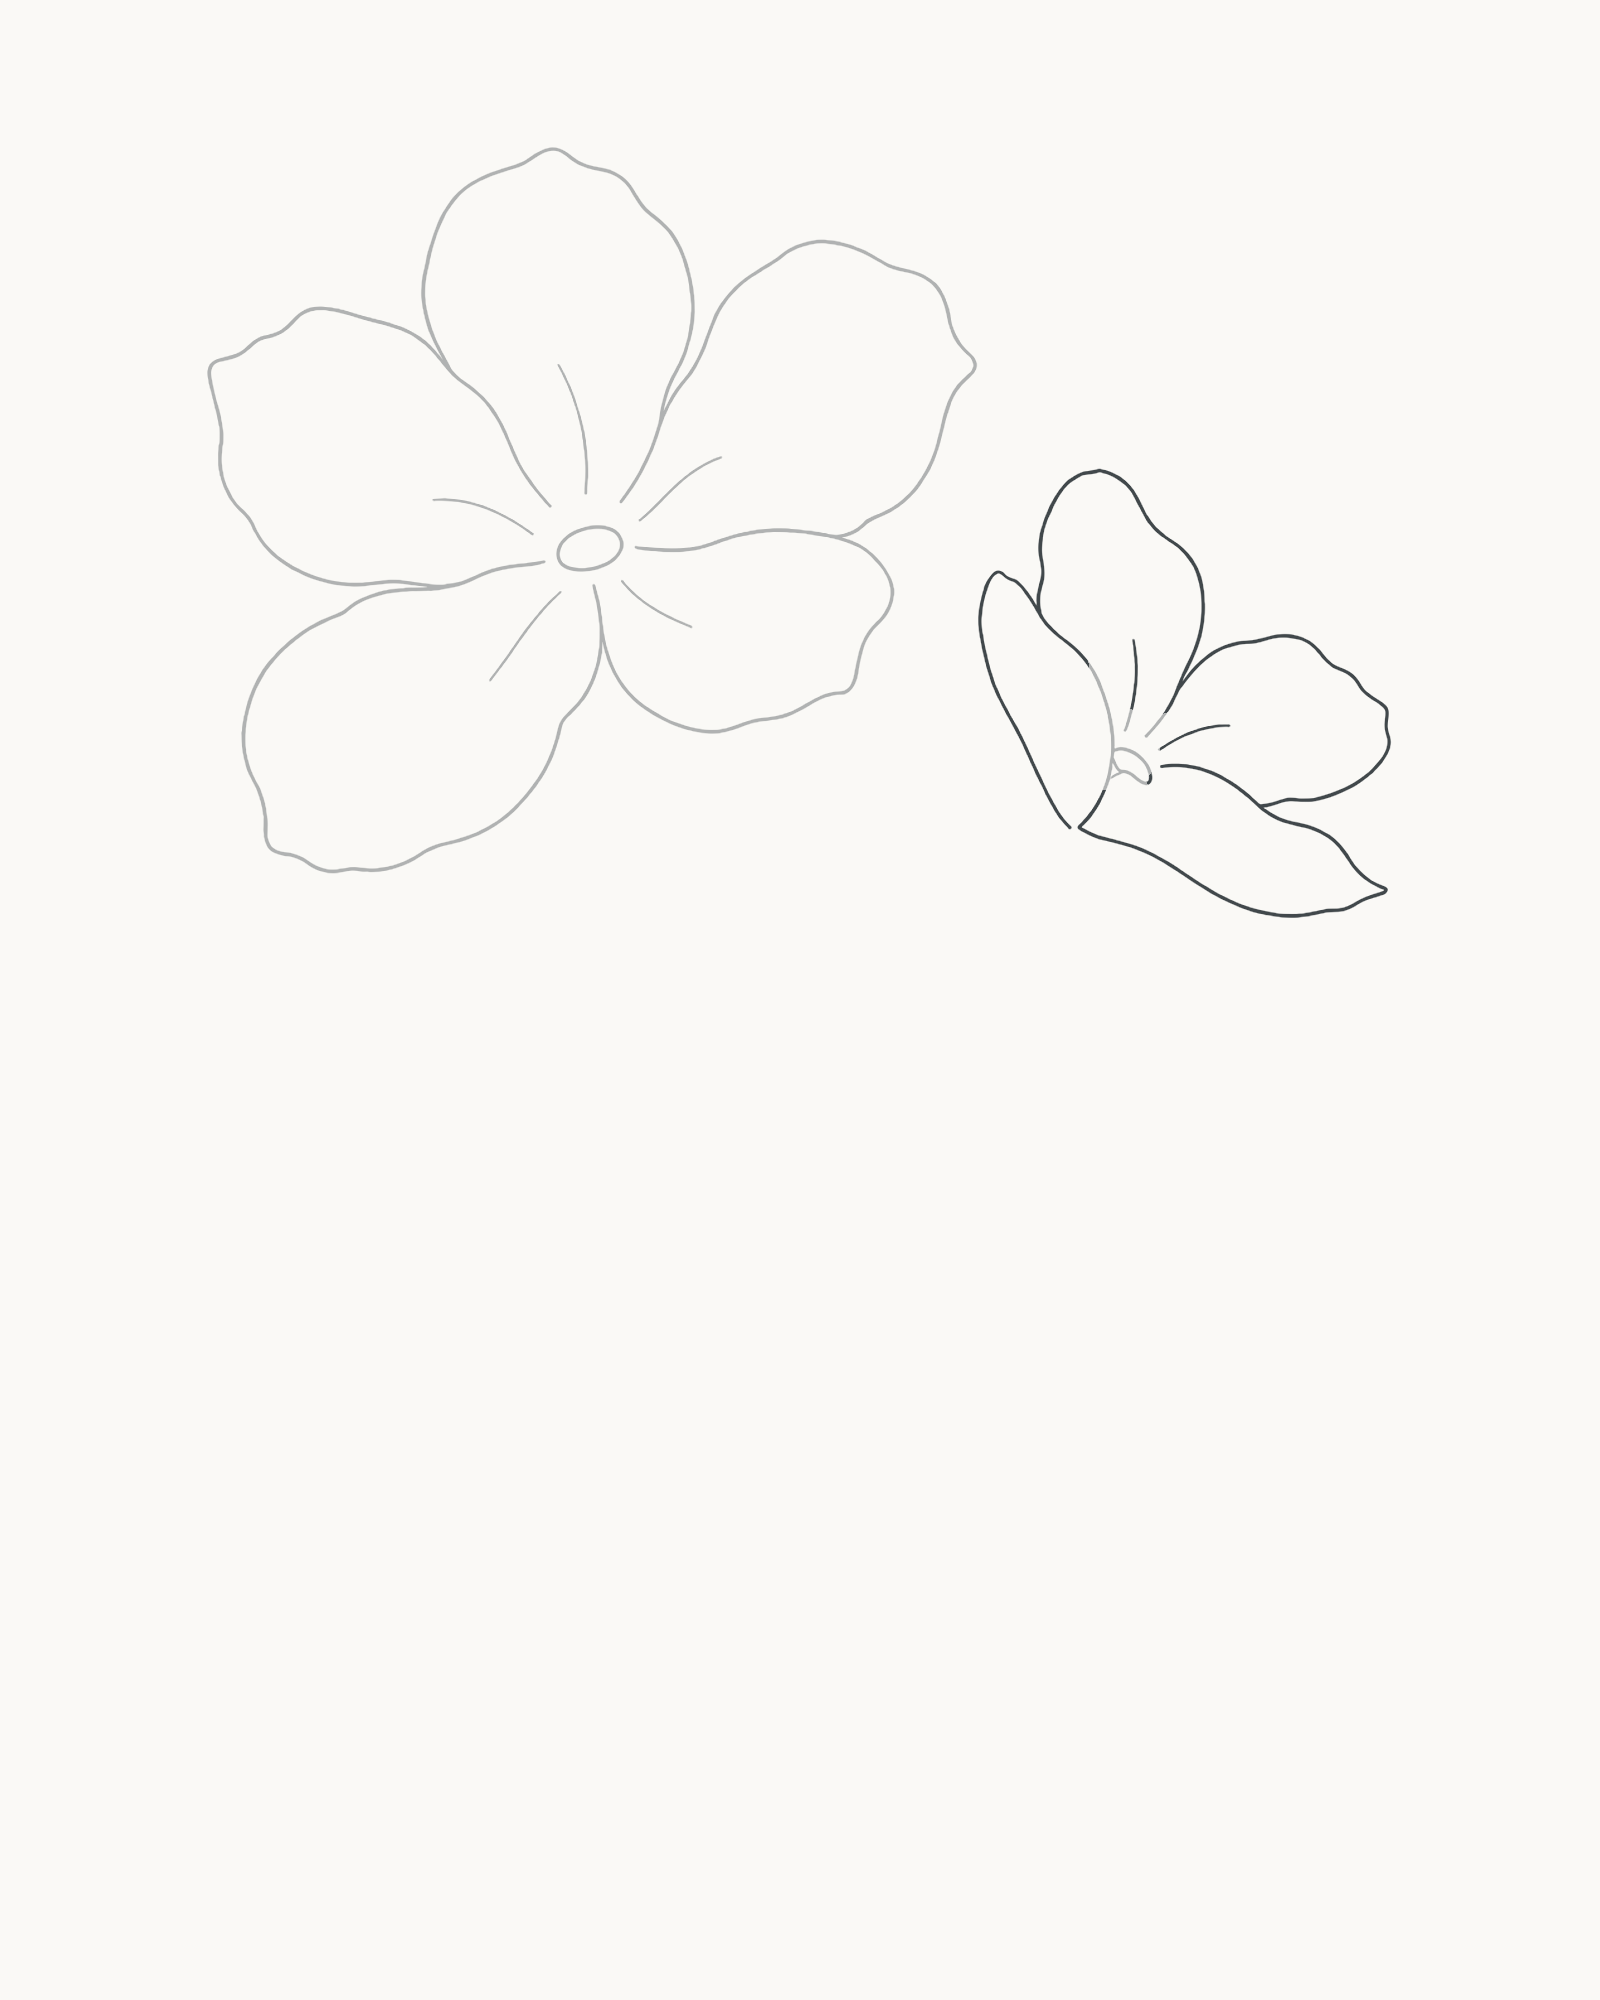
Stage 5 of 8. Four differently shortened petals form a related but distinct side-turned bloom. - Rear-left
- Rear-top
- Far-right
- Near/front
Follow the framework in a fixed order. Close the rear-left petal first, then the taller rear-top petal. Add the far-right petal, allowing it to bend outward, and finish with the short broad front petal cupping beneath the centre.
Each contour must return to its own centre or base. Keep the rear forms taller and the front form compressed; that difference, not shading, creates the turn.
Look for this before moving on: four attached petals form one smaller flower, the short front cup is easy to identify, and the silhouette is not a miniature repeat of the five-petal bloom.
If it goes wrong: preserve the framework and the completed petals. Replace just the most recent contour section between its two sound contacts if an endpoint floats or the front petal grows too long.
6. Connect the flowers
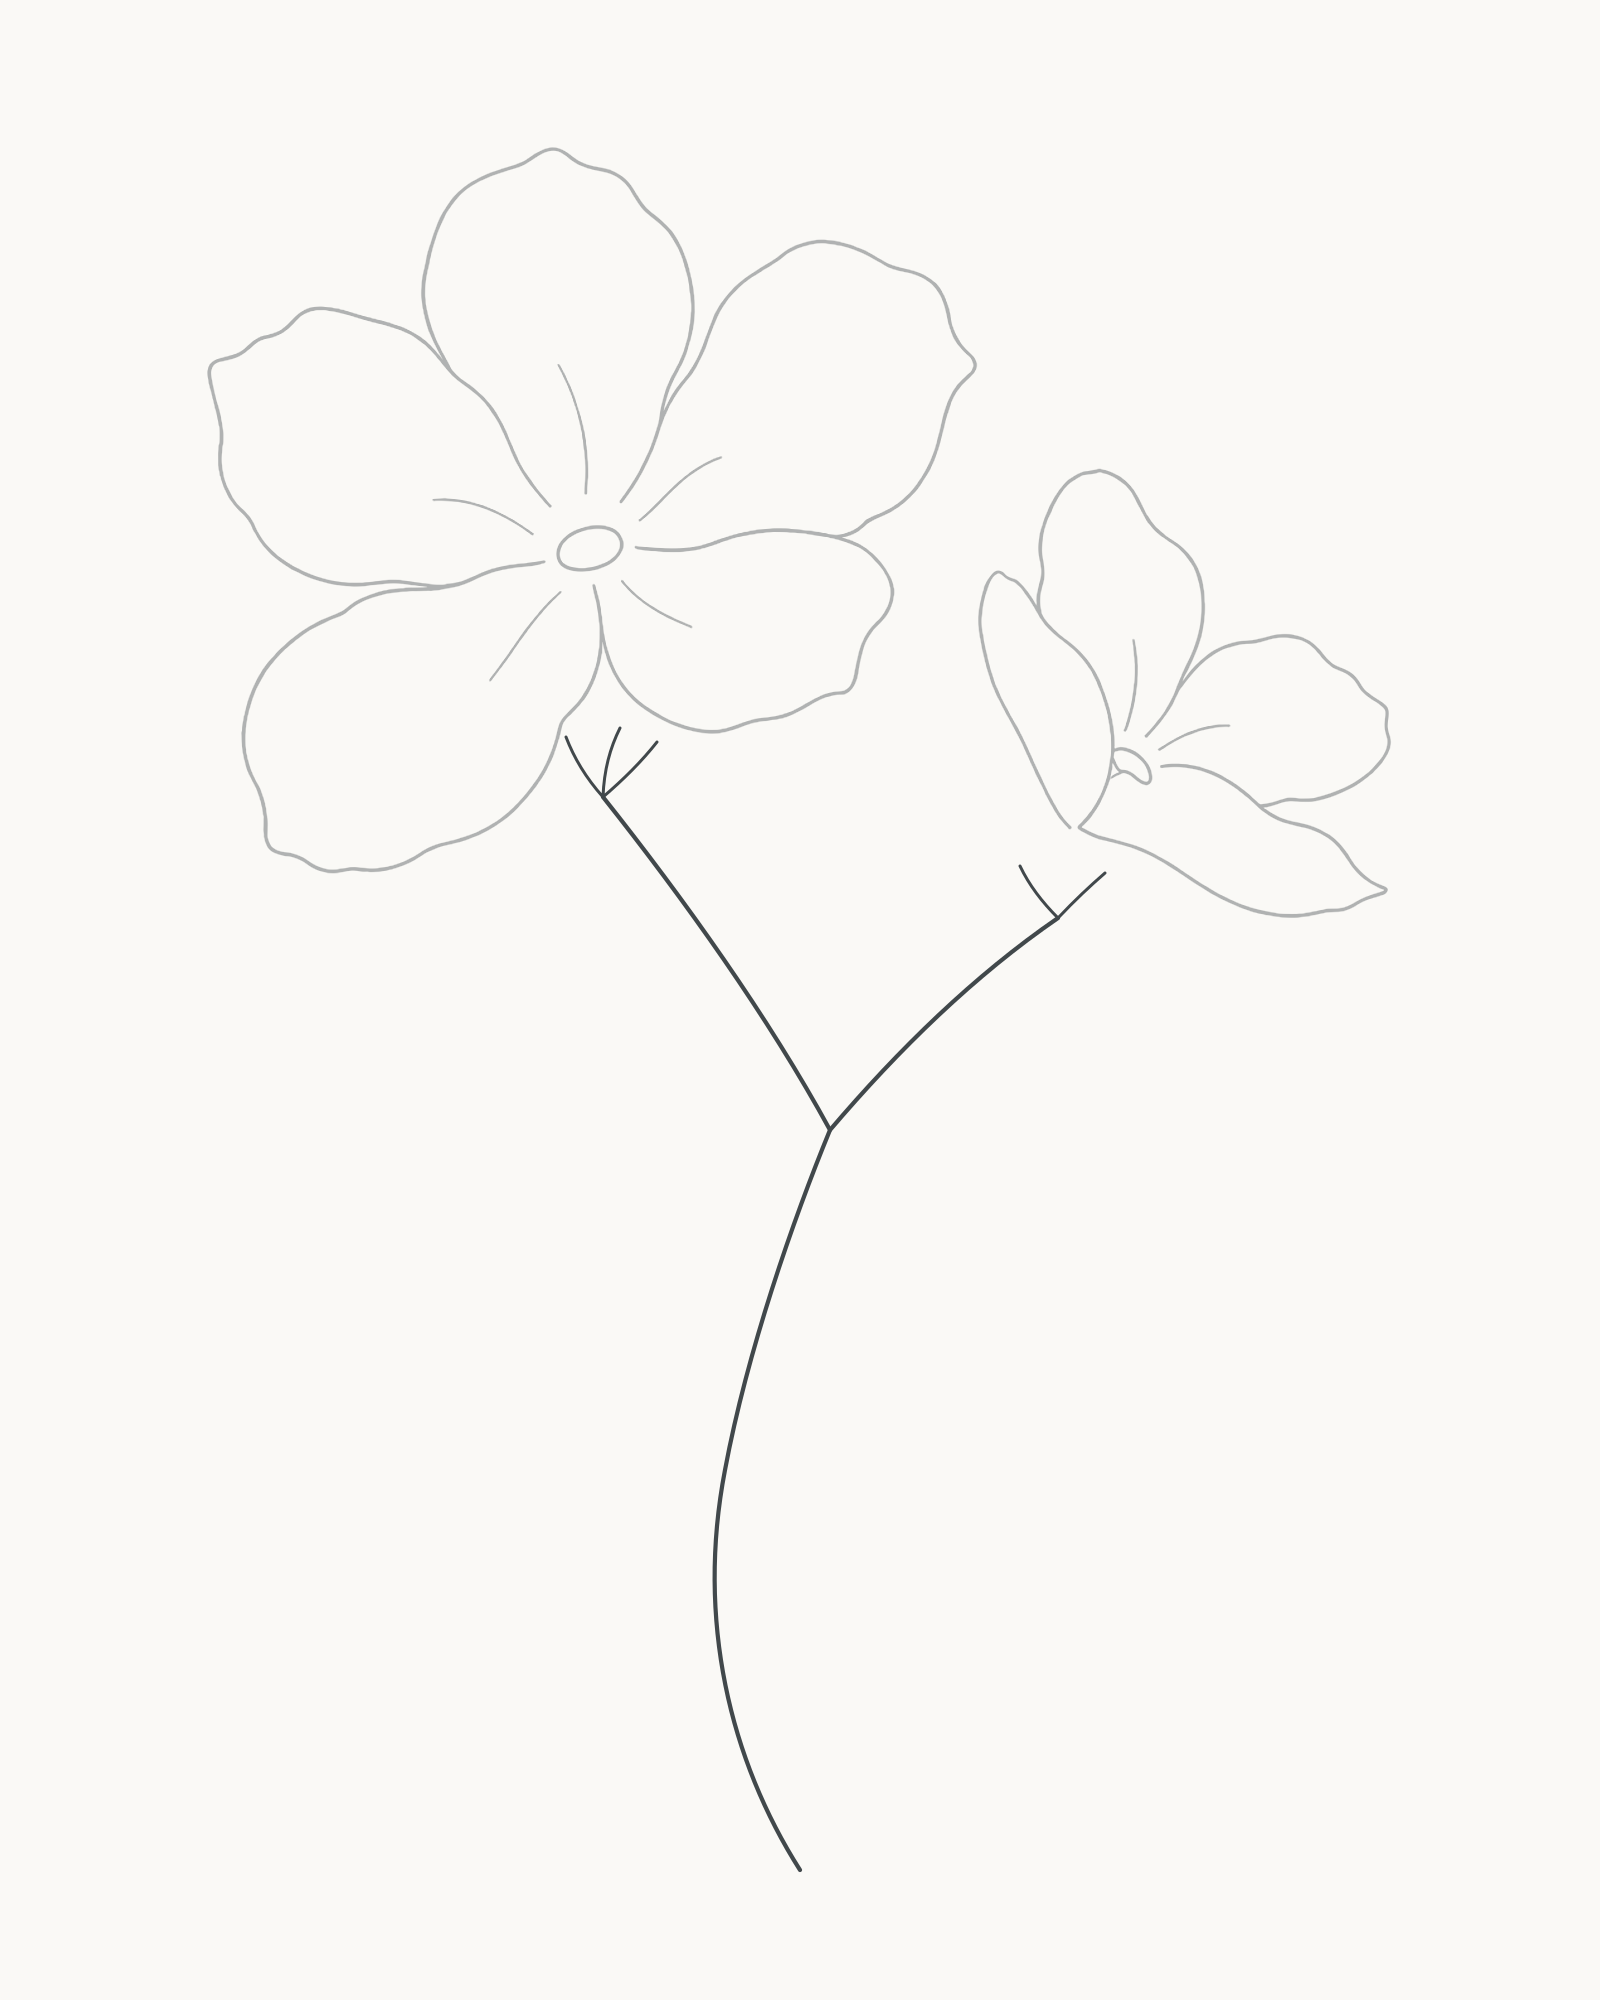
Stage 6 of 8. One stem-and-branch system connects the blooms through clear three-point and two-point supports. Begin near the bottom of the page and draw the single main stem upward as a gentle S-curve. Continue it to the small three-point support immediately beneath the main bloom. These short points indicate the attachment under the petals; keep them smaller than any petal and do not extend them into the flower.
From the bend in the main stem, take one branch up and right to the second bloom. Finish it with the smaller two-point support shown under that flower. The branch and stem should meet in one clean Y-shaped flow rather than crossing or making a black knot.
Look for this before moving on: one continuous structure reaches both flowers, the branch begins on the main stem, and the three-point and two-point supports touch the flower bases without entering the petals.
If it goes wrong: keep the blooms and the sound portion of the stem. Lift only the newest branch or support segment back to its nearest clean junction, then reconnect it with one calm line.
7. Set the two leaf directions
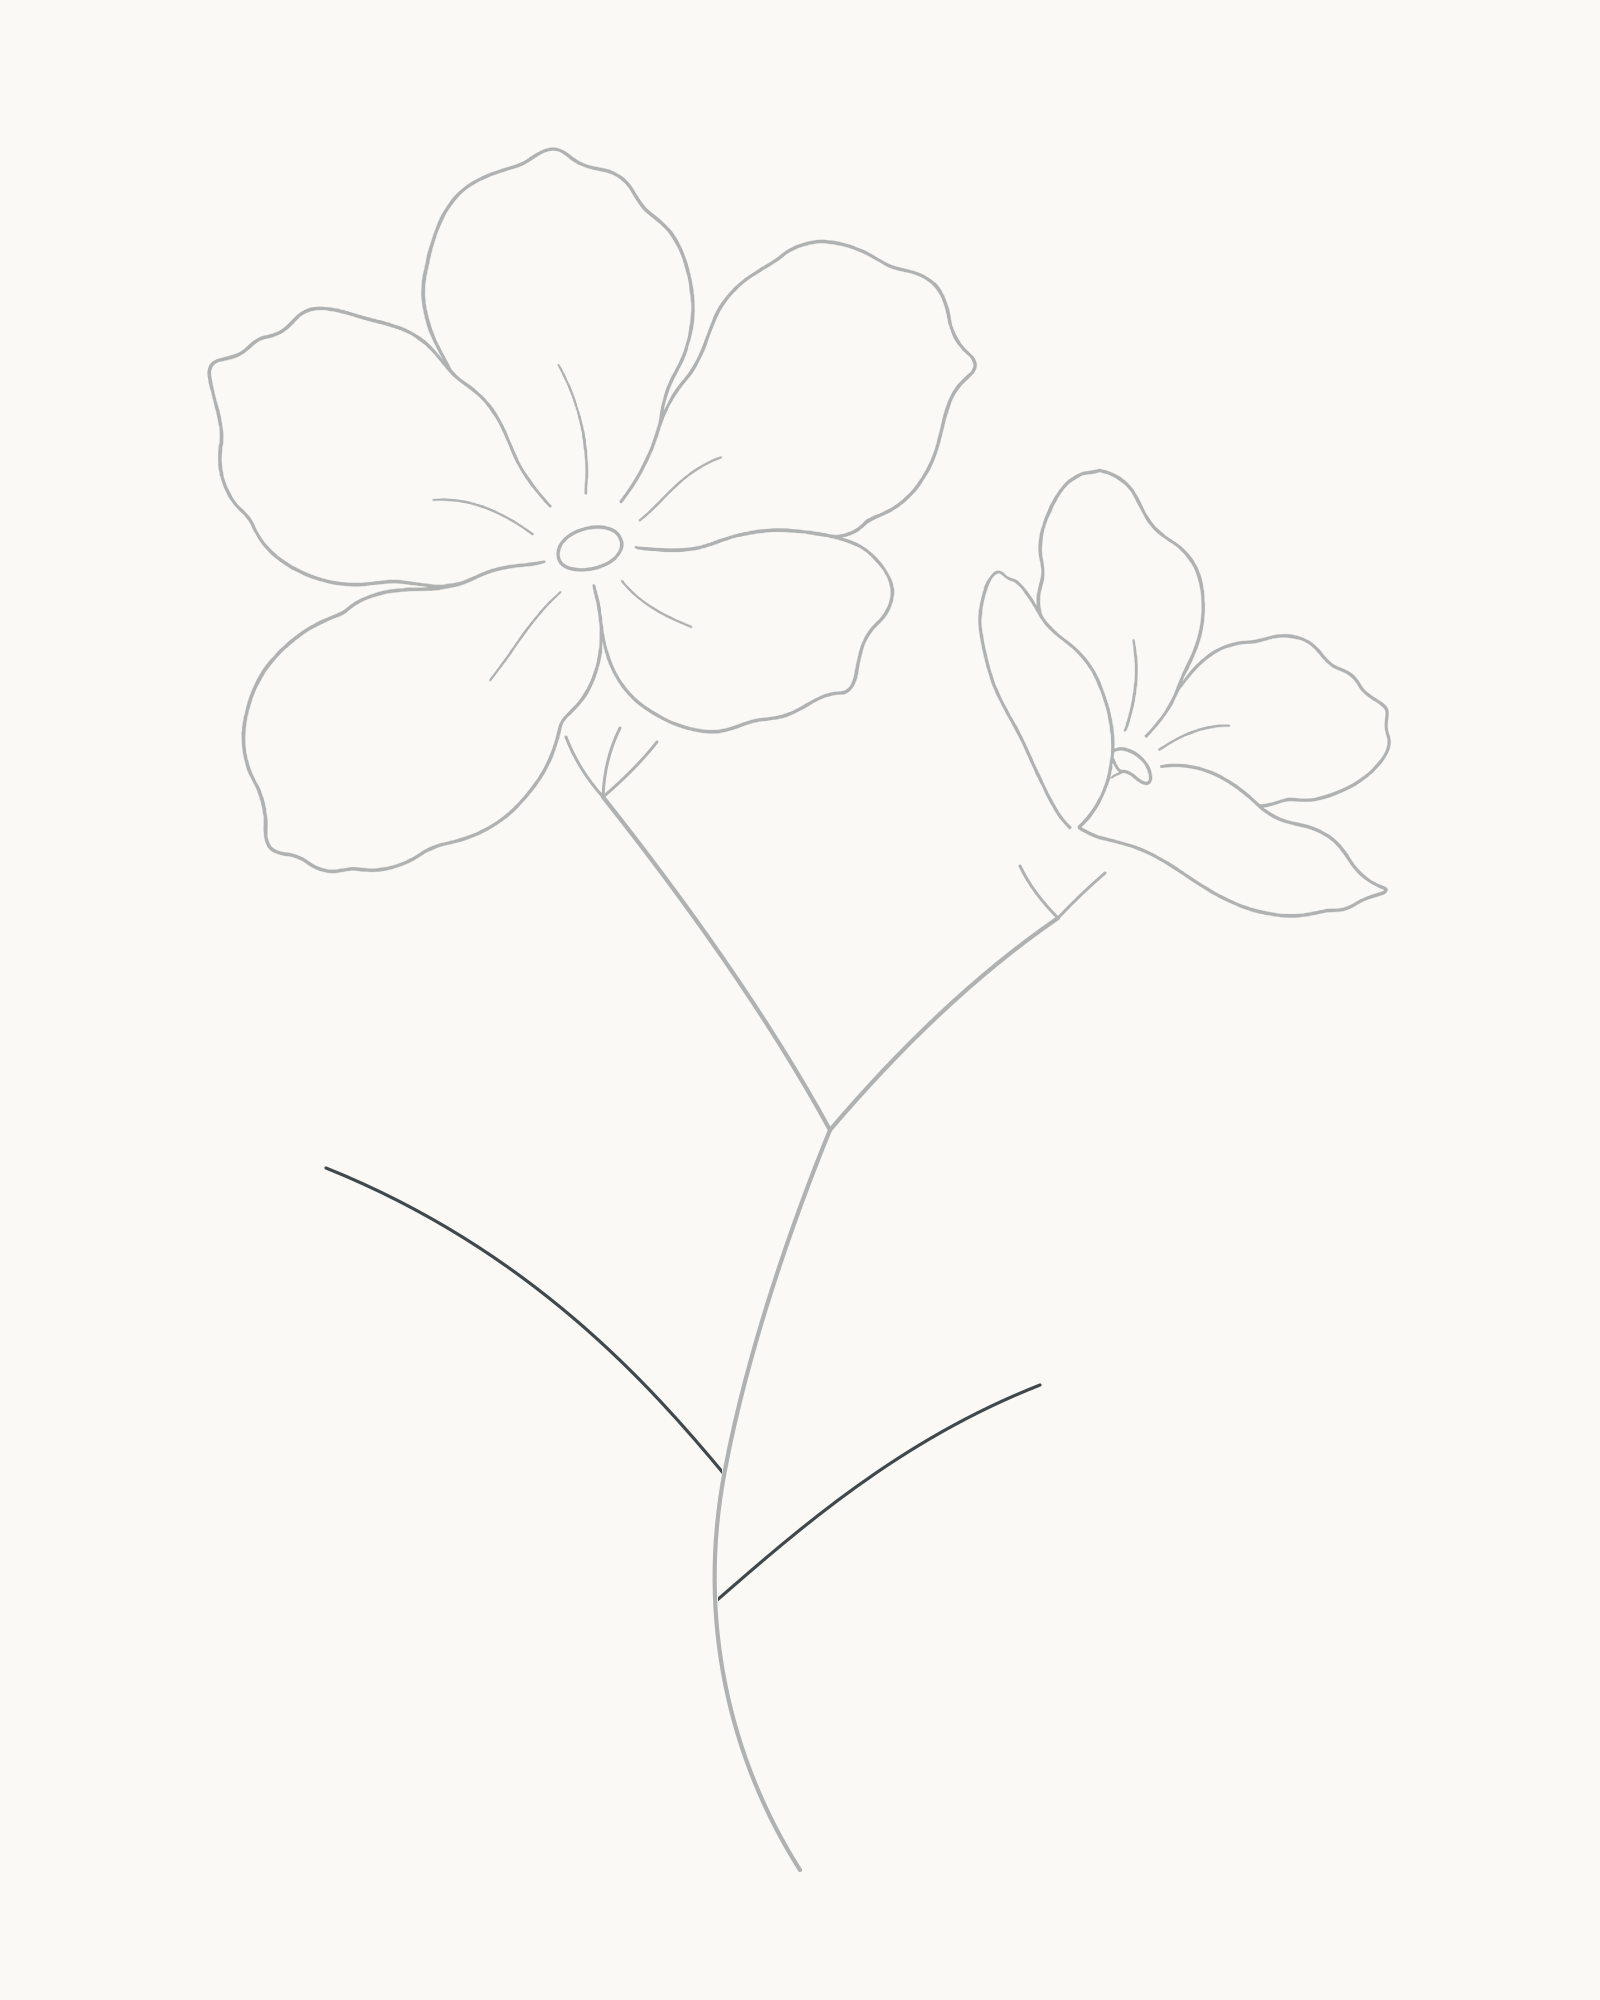
Stage 7 of 8. Two unequal attachment-to-tip lines fix the future leaves without adding their outlines. Draw the longer left attachment-to-tip line first. Begin on the stem below its main fork and sweep it up-left. This permanent stroke will serve as a short leaf stalk and continue through the future blade as its midrib.
Add the shorter right line from a lower point on the stem, aiming it up-right. Do not try to balance the two sides: their height, length and angle are deliberately different.
Look for this before moving on: both lines physically meet the stem, the left reaches farther than the right, and enough white space surrounds each line for a separate leaf contour.
If it goes wrong: keep the stem and the better leaf axis. Erase only the newest line from its attachment and reset its direction before drawing any outline around it.
8. Close and vein the leaves
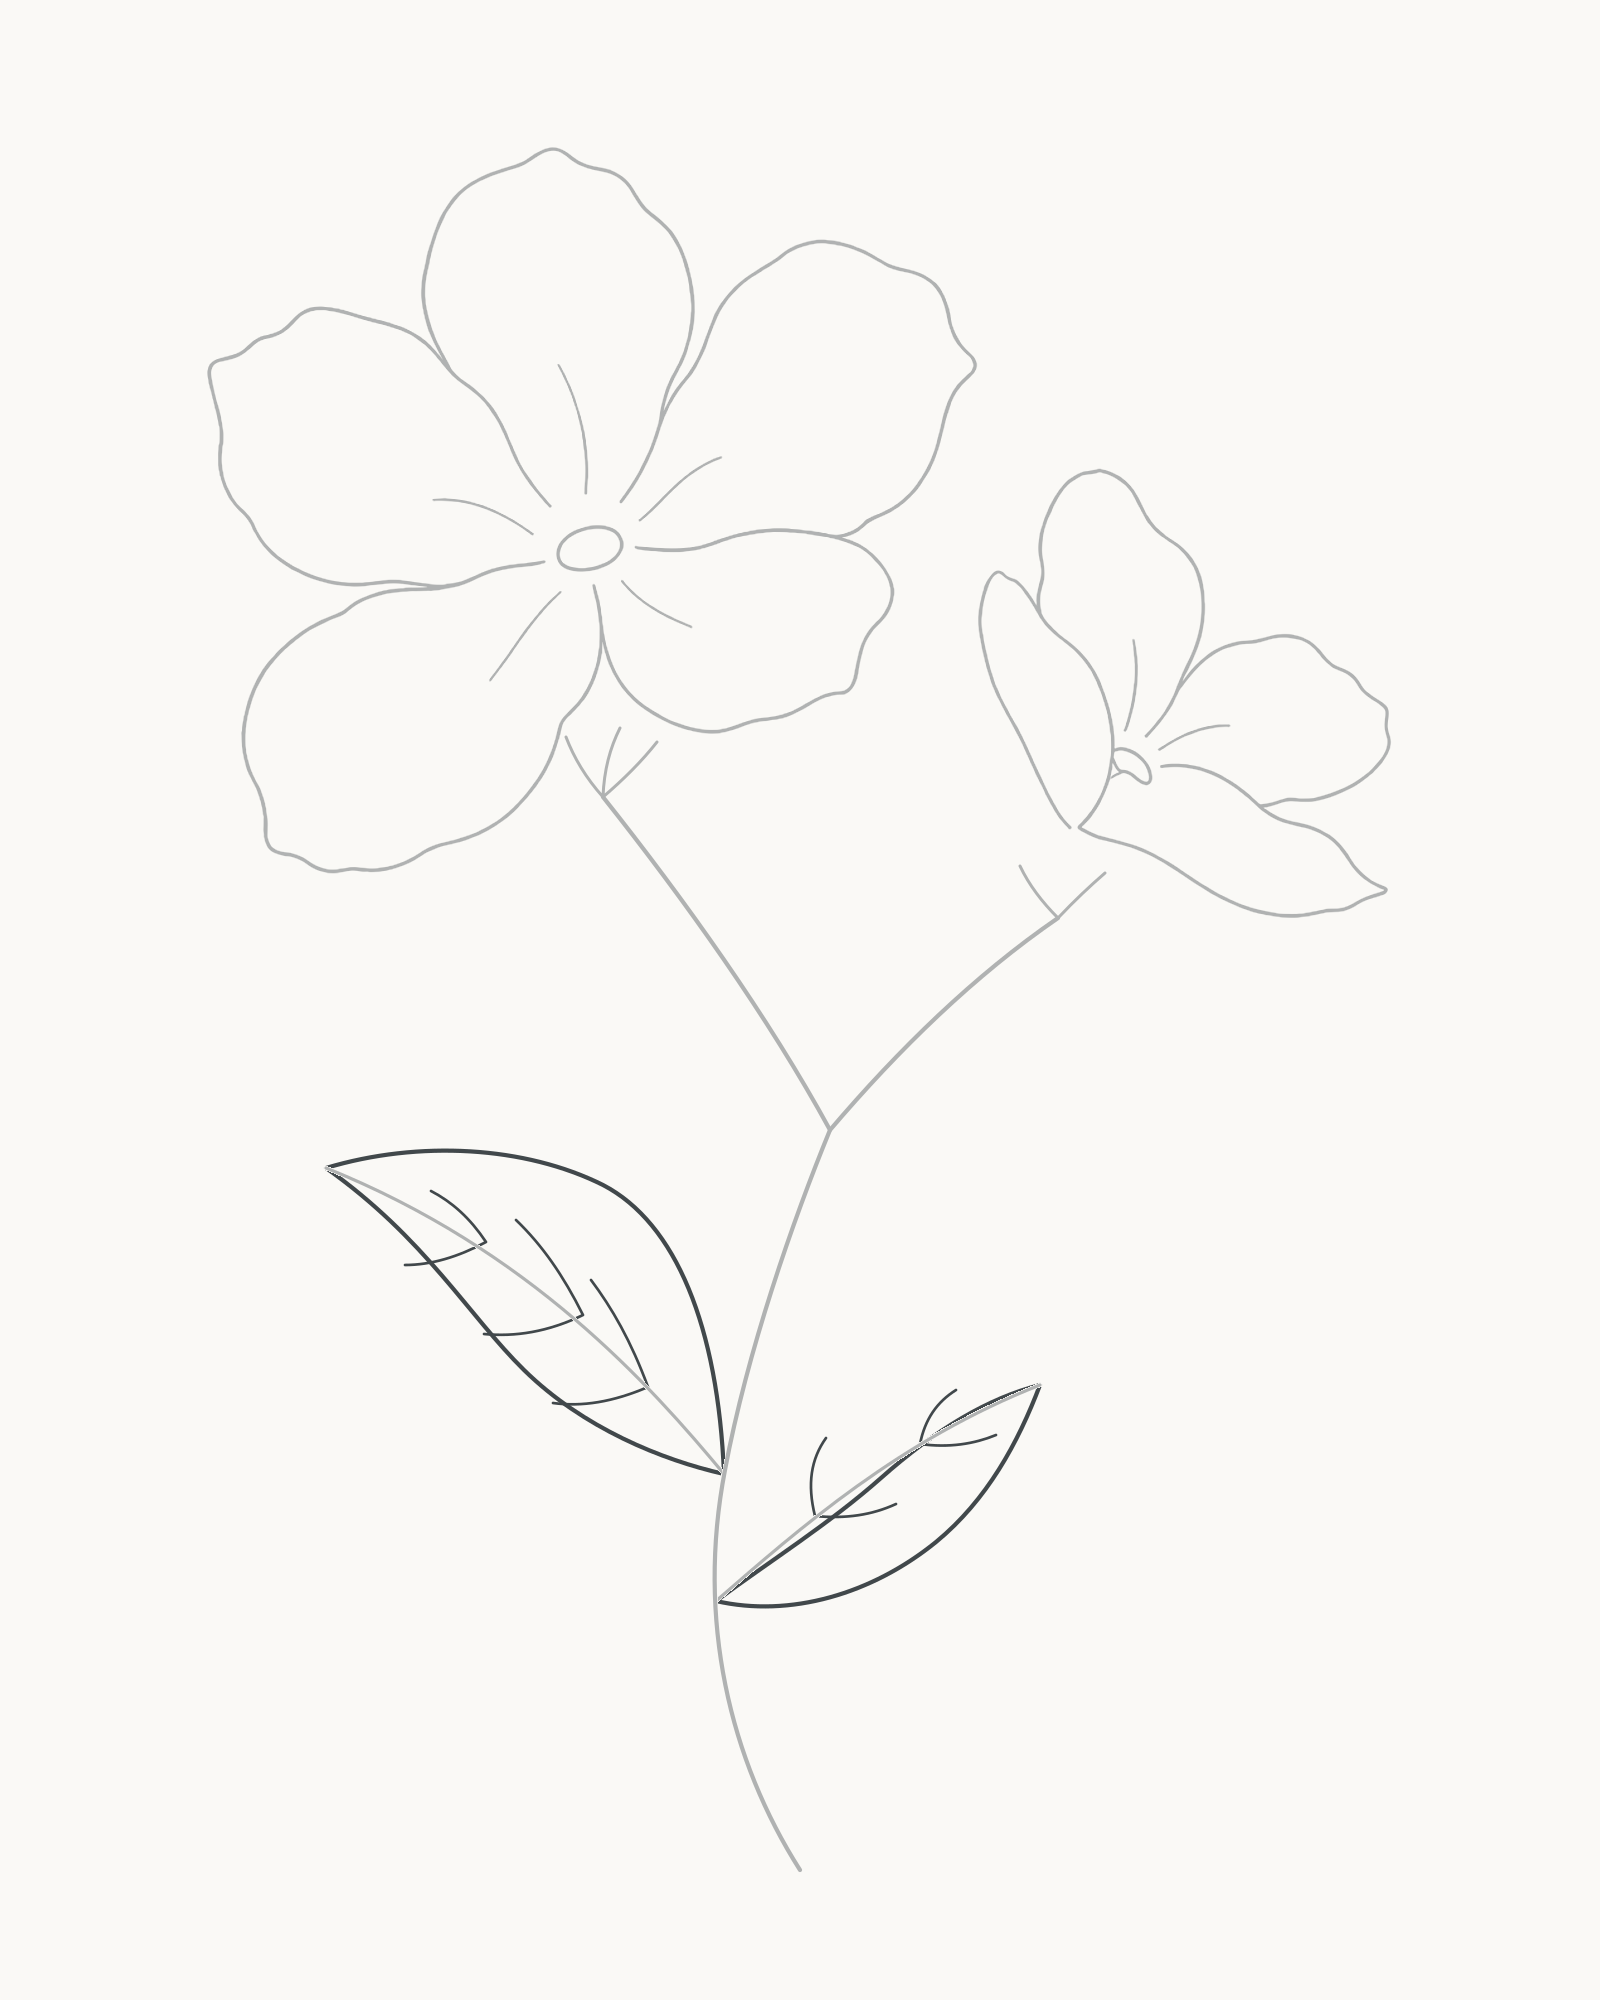
Stage 8 of 8. Unequal contours and sparse exact vein pairs complete the line-only flowering sprig. Shape the larger left leaf around its centre line, using two unequal curves that meet at the tip and taper back to the stem attachment. Close the smaller right leaf in the same way, but keep it shorter and slimmer rather than reflecting the left shape.
Finish with sparse side veins. Add exactly three pairs to the larger leaf and two pairs to the smaller leaf. Start each short line on its midrib, angle it generally towards the tip and stop before the outer edge. These are structural branches, not shading.
Look for this before moving on: both leaves return cleanly to their own attachments, the left and right shapes are unequal, the vein counts are three pairs and two pairs, and open white paper still dominates each blade.
If it goes wrong: shorten or remove only the newest contour section or vein. Preserve the midrib; do not darken the leaf or add more marks to hide a vein that touched the edge.


Common mistakes and small fixes
The main flower looks like a symbol. Compare the five petals rather than decorating the centre. Change the next attempt's widths, tip shapes and reach so opposite petals do not match.
The smaller flower looks like a copy. Narrow its centre and shorten its front petal. A stronger difference between rear and front is more useful than making the whole flower smaller.
Petal bases form a dark star. Begin each contour at a distinct point on the centre edge. Repair one new contact instead of retracing the complete centre.
A support looks like a crown. Shorten only its points. The three and two marks should sit quietly beneath the blossoms and lead the eye into the stem.
The branch seems pasted on. Redraw the newest part of its junction as a narrow flowing Y. Do not run the branch line across the stem.
The leaves look mirrored. Keep the axes and change the newest contour's width or fullest point. The left leaf should remain larger and the right one more compact.
The veins look decorative. Check the fixed counts, shorten repeated pairs and make every line begin on the midrib rather than floating beside it.
Practise a bloom at another angle
On a separate part of the page, repeat only Stages 1–3 with a narrower centre. Keep five directions, but shorten the petal on the near side and allow the rear petal to reach farther. The exercise uses the same permanent-line method while changing the viewpoint, and it will show more clearly than extra texture whether the centre and petal lengths agree.
Frequently Asked Questions
What is the easiest way to begin drawing a flower?
Start with the centre's position and tilt, then place short lines for the petal directions. Close the petal contours only after those unequal spaces look clear.
How can I stop flower petals looking identical?
Vary where each petal is widest, how far it reaches and the small changes around its tip. Preserve the common centre, but avoid reflecting one finished contour to make its opposite.
How do I draw a flower at an angle?
Make the centre narrower than a front-facing circle and give the near and far petals different lengths. A shorter, broader near petal can establish the turn without any shading.
Should I draw the petals or stem first?
In this lesson, complete both blooms first, then connect their supports with one stem and branch. This keeps the petal viewpoints clear while giving each finished flower a precise attachment target.
Do I erase the centre and direction lines?
No. They are permanent inner folds in this drawing and remain unchanged in the final stage. Use the eraser only for the newest local mistake.
Do these flowers represent a particular species?
No. The sprig is an invented generic exercise for practising centre tilt, petal foreshortening and attachments. Use a species-specific lesson when identification features matter.
Should I add shading?
Not for this result. The completed image is a line drawing. Work on clear overlaps, stem junctions and unequal shapes before treating light and tone as a separate exercise.
References
- Reproductive plant parts, Oregon State University Extension — View source.
- Parts of a Flower, American Museum of Natural History — View source.
- Draw Simple Flowers With Circles and Ovals, Toad Hollow Studio — View source.
More DRAWING Guides
How to Draw a Rose: A Step by Step Guide
How to Draw a Tree: A Step by Step Guide
How to Draw Eyes: A Step by Step Guide
How to Draw Leaves: A Step by Step Guide
How to Draw Autumn Leaves: A Step by Step Guide
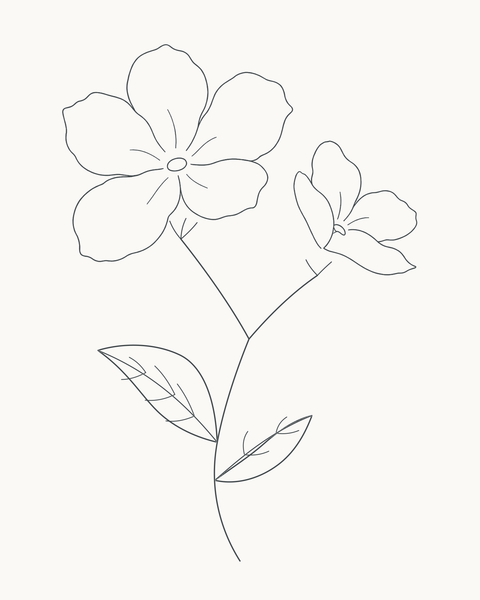
How to Draw Flowers: A Step by Step Guide
How to Draw a Lily: A Step by Step Guide
How to Draw a Sunflower: A Step by Step Guide
How to Draw a Tulip: A Step by Step Guide
How to Draw a Hibiscus: A Step by Step Guide
How to Draw a Daisy: A Step by Step Guide